Build a DIY Server Rack with Old Hardware to Learn Cloud Skills

If you're a computer enthusiast, then you've must have enjoyed building your own PCs. But after years of PC building and upgrading hardware, what do you do with your old components? This article is an exploration of the neat things that you'll be able to do to put your old hardware to good use by building a distributed home compute platform.
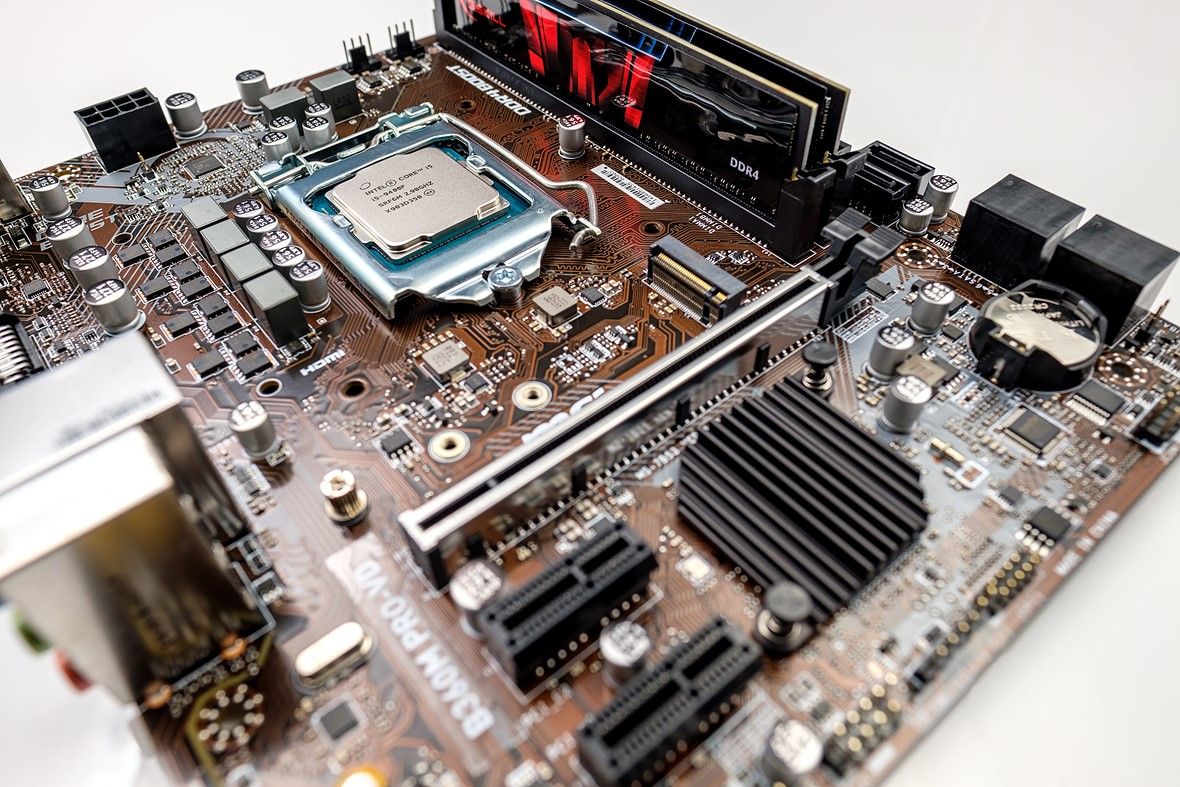
There will eventually be a time where a new generation of hardware comes out where you end up replacing CPU, motherboard and RAM with new components as you upgrade to the next generation of hardware. The upgrade leaves you with a disembodied computer (assuming that you've just replaced the components of your PC case) and a premonition that throwing away your old parts might be a waste of a perfectly good computer. What could you do?
While there is a great migration to cloud platforms for elastic compute, there are advantages to keeping your own hardware to use as spare compute and learn as an analogy to how cloud platforms work but from the comfort of your own home.
A comparison between running your own servers using old hardware versus using AWS
How much does it cost to run a PC in the cloud for one year? Let's take the example of a decently sized machine running on AWS as of today.
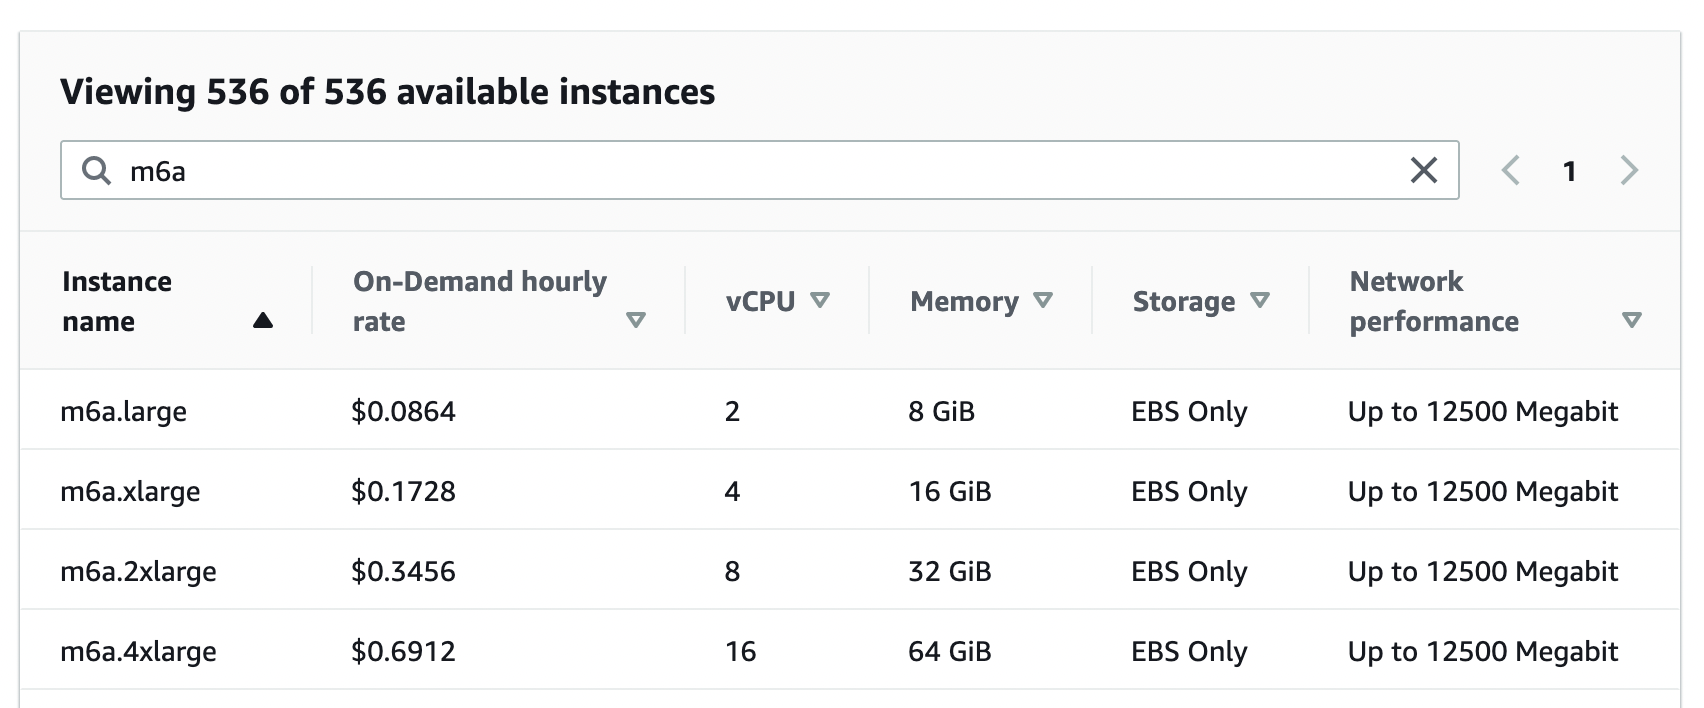
Using a modest m6a.xlarge instance on AWS with a price of $0.1728 / hour. Running a machine such as this for a year would cost $1513.73 to operate for an entire year. Also note that an AWS vCPU is also a single thread of a hyperthreaded CPU which allows 2 threads per CPU, meaning you're only getting half a CPU core per vCPU. If you have old hardware around with 2~4 cores, you'll easily likely to have comparable performance to a m6a.xlarge machine without needing to launch an instance on AWS.
The main benefits of running machines in the cloud is that you'll be able to spin up and down machines on demand without needing to worry about physical location or availability of hardware – this is great if you're in need of launching something on demand without needing to worry about hardware. However, in this case you've got spare hardware that you're interested in putting into good use!
Learning about the Cloud by Building a Data Center at Home
Now that we've discussed the advantages of putting old hardware into good use, it's completely feasible to use old hardeware in liew of cloud compute if you have it and the space at home to run your own hardware. There are different options available depending on space and the amount of hardware available.
Parts enough for a single old computer or more?
The challenging decision to make is if you only have parts enough for a single PC and don't forsee youself having additional hardware over the next few years to add put additional PCs to good use. In this situation it might make sense to simply buy an additional PC case or leave the old hardware in it's original case and do a build in a completely new PC. If you anticipate that you might have additional old hardware becoming available down the line, building your own PC rack might be an interesting solution.
Deciding to put together your own computer rack
There are multiple routes to go with this option, which I find the most interesting. There is obviously the pre-fabricated server rack with server trays for installation.
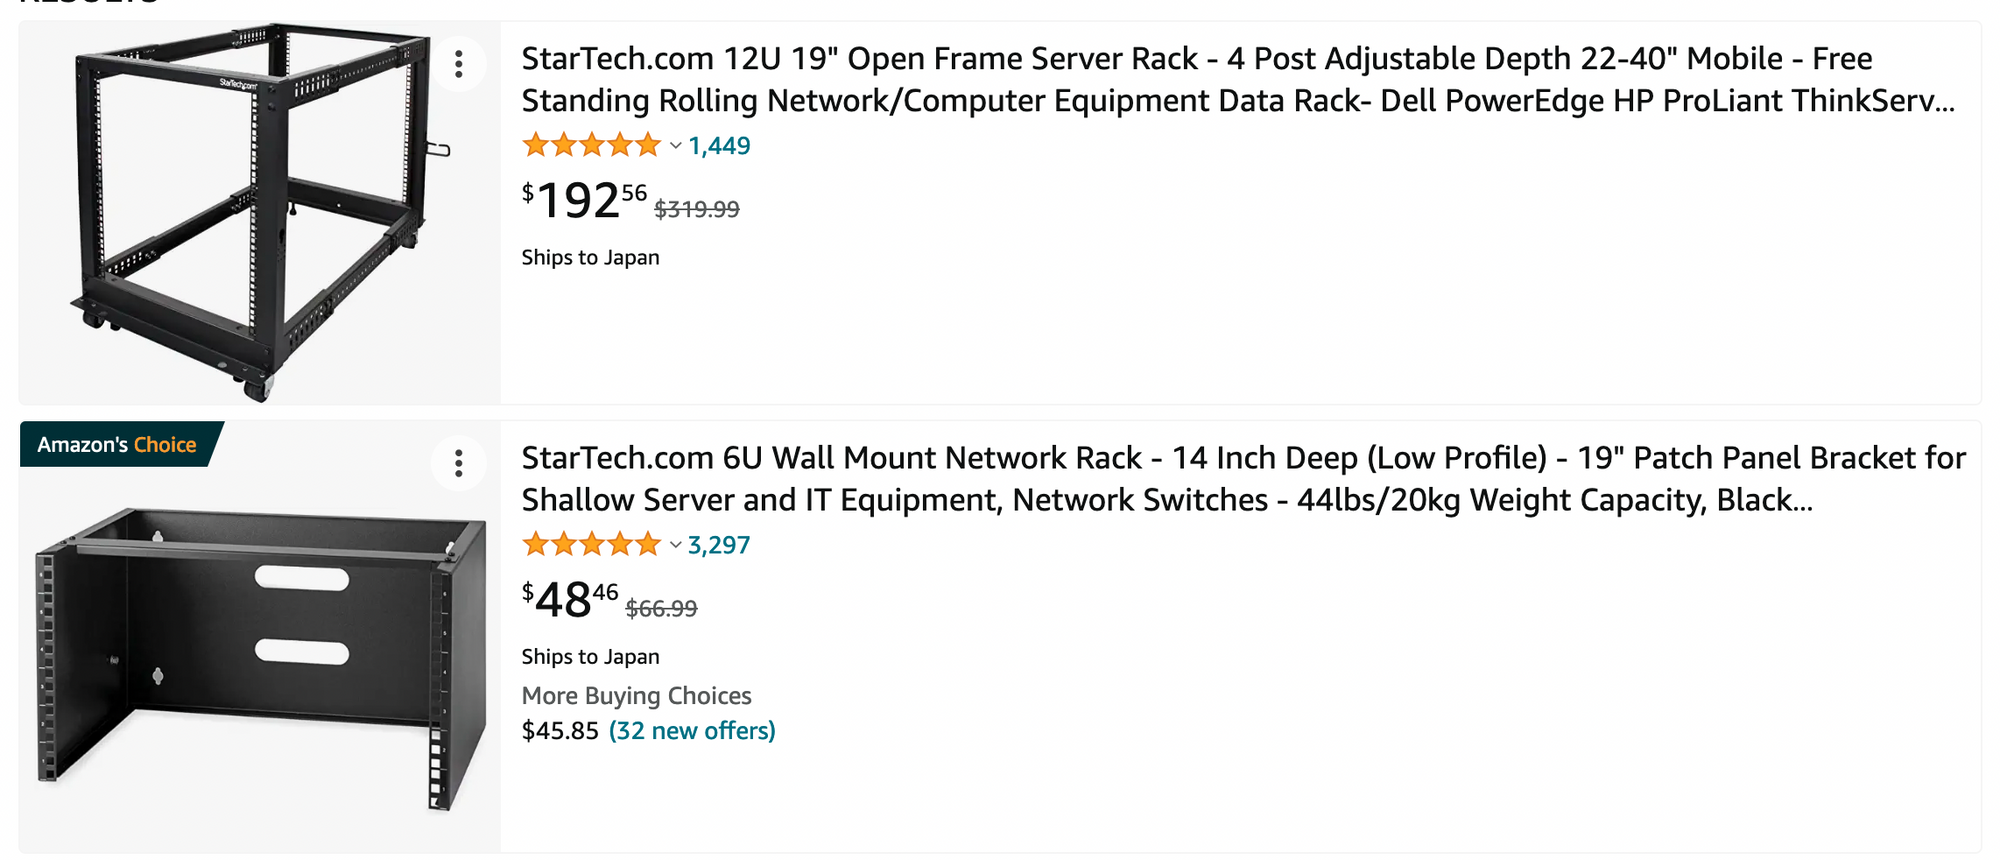
Server racks can range in price from the cheap end of $50 for a wall mount rack (screwed into a wall) and upwards of $200 for a free standing rack. Server chassis for each server will likely cost in the ball park of $50 for each system you decide to install. This can be surprising as very cheap computer cases can go for approximately $50 for each case instead of a tray like chassis.
One other alternative would be to DIY a setup and build your own rack if the resources and hardware are available depending on where you are. For where I am located, I have access to hardware stores that are willing to cut wooden panels at a reasonable price which allows me to build a rack and tray cabinet for under $130.
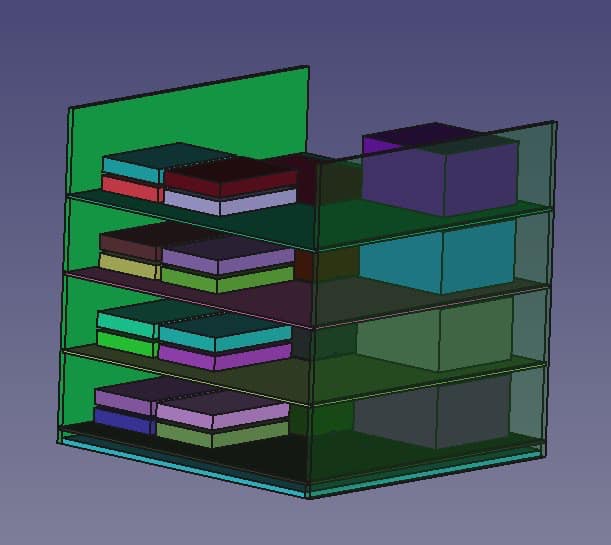
A Server Rack Model using FreeCad using ATX motherboards
Putting some python experience to work, I was able to 3D model a server rack using FreeCad, using a parameteric created in Python. Doing a parametric design in Python allows design flexibility by parameterizing placements, sizes and marging programatically instead of moving each 3D element by hand. The design below is one conceptual design using an ATX case, a standard power supply and allowing up to 4 hard drives for each server.
With the overall design in place, it becomes a simple task of using the specifications to DIY the cabinet design and source the appropriate sized panels to build the rack.
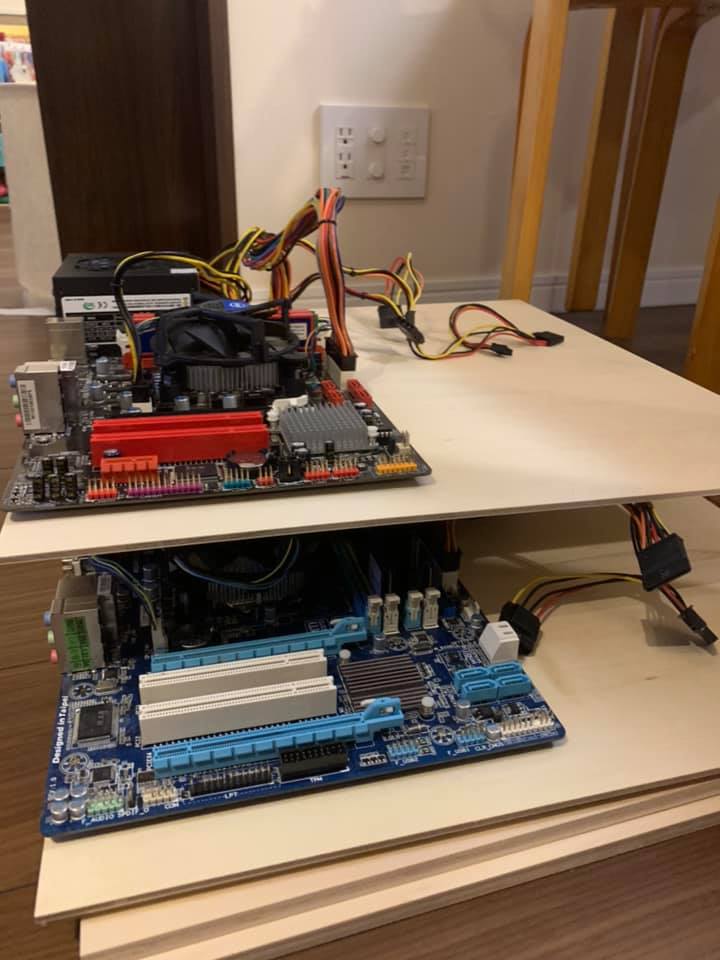
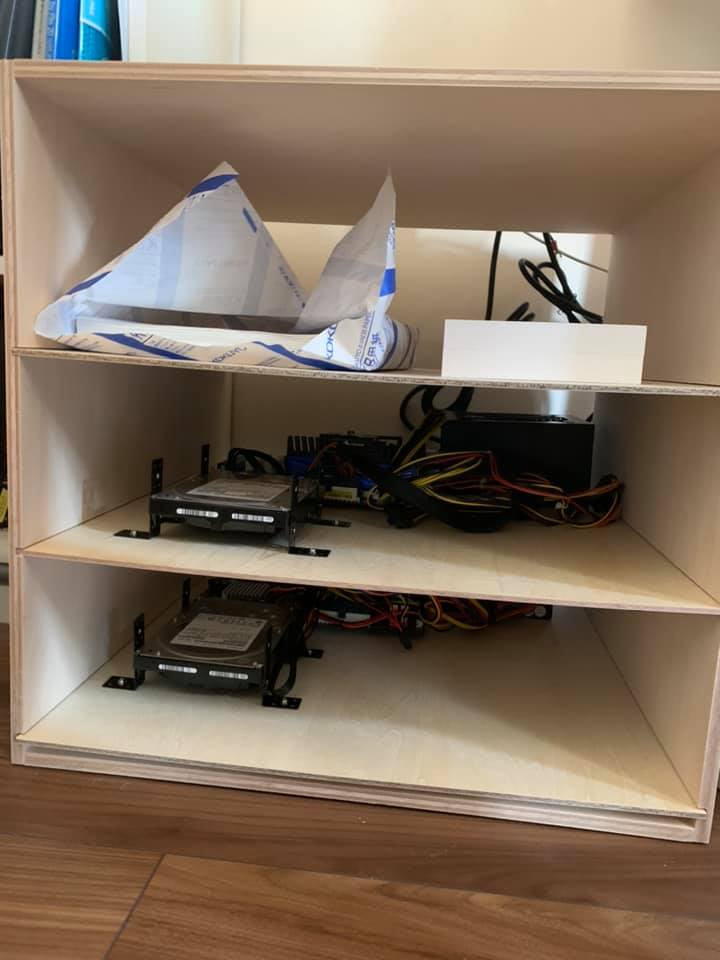
The image on the left is a work in progress shot of mounting the motherboard onto wooden trays using stand off screw mounts and the right is the completed wooden cabinet with 3 trays (the 4th tray with removed from the design to provide additional spacing between the trays). In my case, 2 spare complete systems were available to me that made sense to build a DIY rack.
Once the machines were assembled and installed into the cabinet, the next step becomes setting up the machines in a useful manner at home.
How Setting up Servers at Home is like working with a Cloud Provider
In the home environment you'll generally be working on your laptop or a dedicated PC at home instead of needing to operate additional PC hardware as you might not need them operating all the time. The question becomes, how does one manage elastic resources at home in a cloud like manner and what analogies can one derive?
Running a DNS at home to allow dynamic identification of your machine's IP address
I cover in a previous post a tutorial on how to run your own DNS server using bind9. This is useful to provide a name server with approprirate permissions to allow your machines to register their ip addresses to specified names on boot or when they wake from long periods of hibernation – this prevents the need to preconfigure your machines with specific static IP addresses, needing to scan for ip addresses for running machines or logging in directly (via monitor and keyboard) to grab the ip address of the newly running machine.
Automating machine configuration with Puppet or Ansible
Once the machines are running on the local network, installing software and configurating the machines then becomes a chore that is best automated using approprate tooling. Puppet and Ansible are both state management systems that allows automated configuration and setup of machines, these tools also allows for autoamted configuration updates from a central source which also become a scalable solution, especially when managing large number of machines.
In my case, these additional machines can be automatically started using a wake-on-lan command to allow these machines to boot up on demand, connect to the network and join a distributed compute pool using Python Celery.
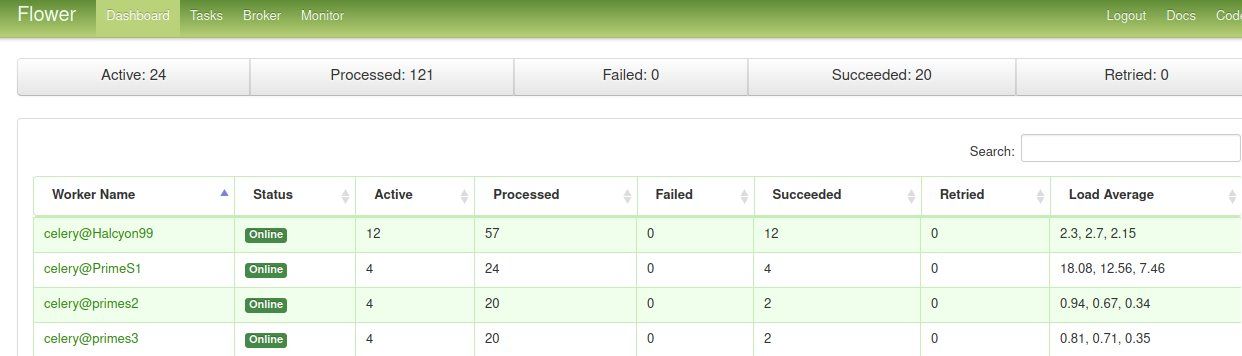
By using automated state management systems, it becomes easy to launch services automatically to allow the newly spun up machines to join a job queue and provide additional CPUs to compute intensive tasks. These machines can then be spun down on demand to save on eletricity costs when not in use by logging into the machines remotely and hibernating them.
Summary
Taking old hardware and building a distributed compute system is a benefical way of learning and applying cloud like skills in a home network / data center environment. While there can be multiple ways of setting up a server cabinet, the process of setting up your own dynamic distributed system at home will lead to an education of setting up a DNS server, using autmated configuration, automated spin up and spin down of systems and deployment of software with service management to create a distrbuted compute system at home.
This is not a light topic and this article provides a cursory overview of possibilities of what can be learned through putting old hardware to good use. If you are interested in learning more about this setup, feel free to reach out through our contact us page.


