Tutorial: Use Bind9 to setup your own DNS service

If you have multiple computers at home, settings up naming for your PCs might be something nice to do to make things easier to manage instead of referring to ip addresses all the time. Sure there might be ways of doing auto discovery on your network, but having the capability to have direct mappings of ip addresses to names of your internal machines is useful when distributing services across different machines. I'll provide a short dockerized tutorial on how to accomplish this.
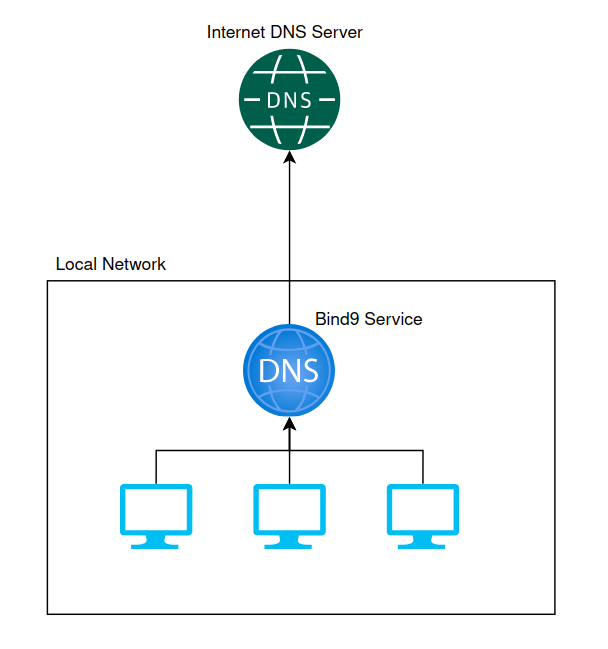
So what does the setup of a domain name server at home look like? I've created a diagram below to illustrate a simple setup:
A common utility to use in the linux word is a bind9. The software is freely available and easy to install. The easiest way to learn how to setup this service is running via docker and a good image to use is provided by ubuntu here. Alternatively, if you're interested in a local installation, on a ubuntu system would be as simple as a sudo apt-get install bind9 and you'd have it installed in your system.
For the purposes of this tutorial, I'll be assuming that you'll be running on a Ubuntu like system and with docker.
Start off by cloning the bind9-tutorial repository via git clone https://github.com/spherex-dev/bind9-tutorial.git. This repository provides scaffolding with configuration files and some initialization scripts to help with the confguration of a dns server. It uses a bind9 docker image provided by ubuntu.
Once the repository has been cloned, follow the steps below to configure, run and set your first record into your dns service:
- Modify the
./etc/bind/named.conffile to update the CIDR mask to suit the ip range of the network. This allows machines on your network to set their own dns records. - (optional) update the
./etc/bind/named.conf.optionsfile to point to the upstream dns servers of your choice. - (optional) update the
./var/lib/bind/home.int.hostsreplacingmy-machinewith the name of the machine in the domain and optionally adding an e-mail address in the SOA. - When you are ready to run the docker image, run the
set-bind.shscript to update the file permissions of theetcandvardirectories to user101as this is expected user id needed to allow bind to read the files. - copy the
docker-compose-example.ymlfile todocker-compose.ymland update the ip address of the host that will run the bind9 server. I've left in an example value of172.16.81.120which you can modify to suit your needs. - run
docker-compose up -dto start the bind9 container. - update the
./scripts/update-record-exampleto point to the correct dns server and set the ip address of some A record and runnsupdate ./scripts/update-record-exampleto update the record. - To test that dns record has been set you can run
host test.home.int 172.16.81.120(replace 172.16.81.120 with your ip address) to verify that the record has been set.
If you have followed the steps above, you should be able to verify that an A record has been set via the host command and you should receive back a response that looks like the following:

If you've got the response back, contratuations! You've been able to setup a dns service and set a record.
If you're happy with this service, you'll then be able to configure your machines in your local network to point to this DNS service and use it to look up machines via names you give them in your local network.