A Beginner's Guide to Setting up your own Cloud Storage

Running your own cloud storage solution can make sense when there is a need to store your own data. While platforms like Dropbox, Google Drive, iCloud and more are available, having your own managed cloud storage can make sense as another tool in your belt for online storage. It's also quite easy to get started with too.
There are some advantages to having your own cloud storage solution:
- It runs anywhere on a cloud provider or on your home PC/Server
- Space requirements can be directly managed by the user
- Cost savings to teams or family, without needing to pay for accounts for each member
- Should there be any problems, owncloud is easy to redploy on to new hardware
In this walkthrough I'll go through a simple setup using a dockerized version of owncloud, with redis and a database – it's also amazingly easy to setup and get running. Just be aware that this is only a development setup. To ensure that you have a secure setup, it is recommended to change the default logins and passwords before exposing this owncloud installation to the internet.
Prerequisites
Ensure the following are setup and configured in your machine:
- docker to run containers
- docker-compose to run multiple containers with defaults in a docker-compose file
- git to close our repositories from github
Procedure
The repository to get owncloud running using docker is based on the owncloud docker documentation here.
Instead of following through the documentation to get your test version of owncloud by running the following commands in a terminal
git clone https://github.com/spherex-dev/owncloud-docker
cd owncloud-docker
docker-compose up &
Once the docker-compose command has been executed, you'll see indications that the new containers are coming on line in your terminal, similar to below:
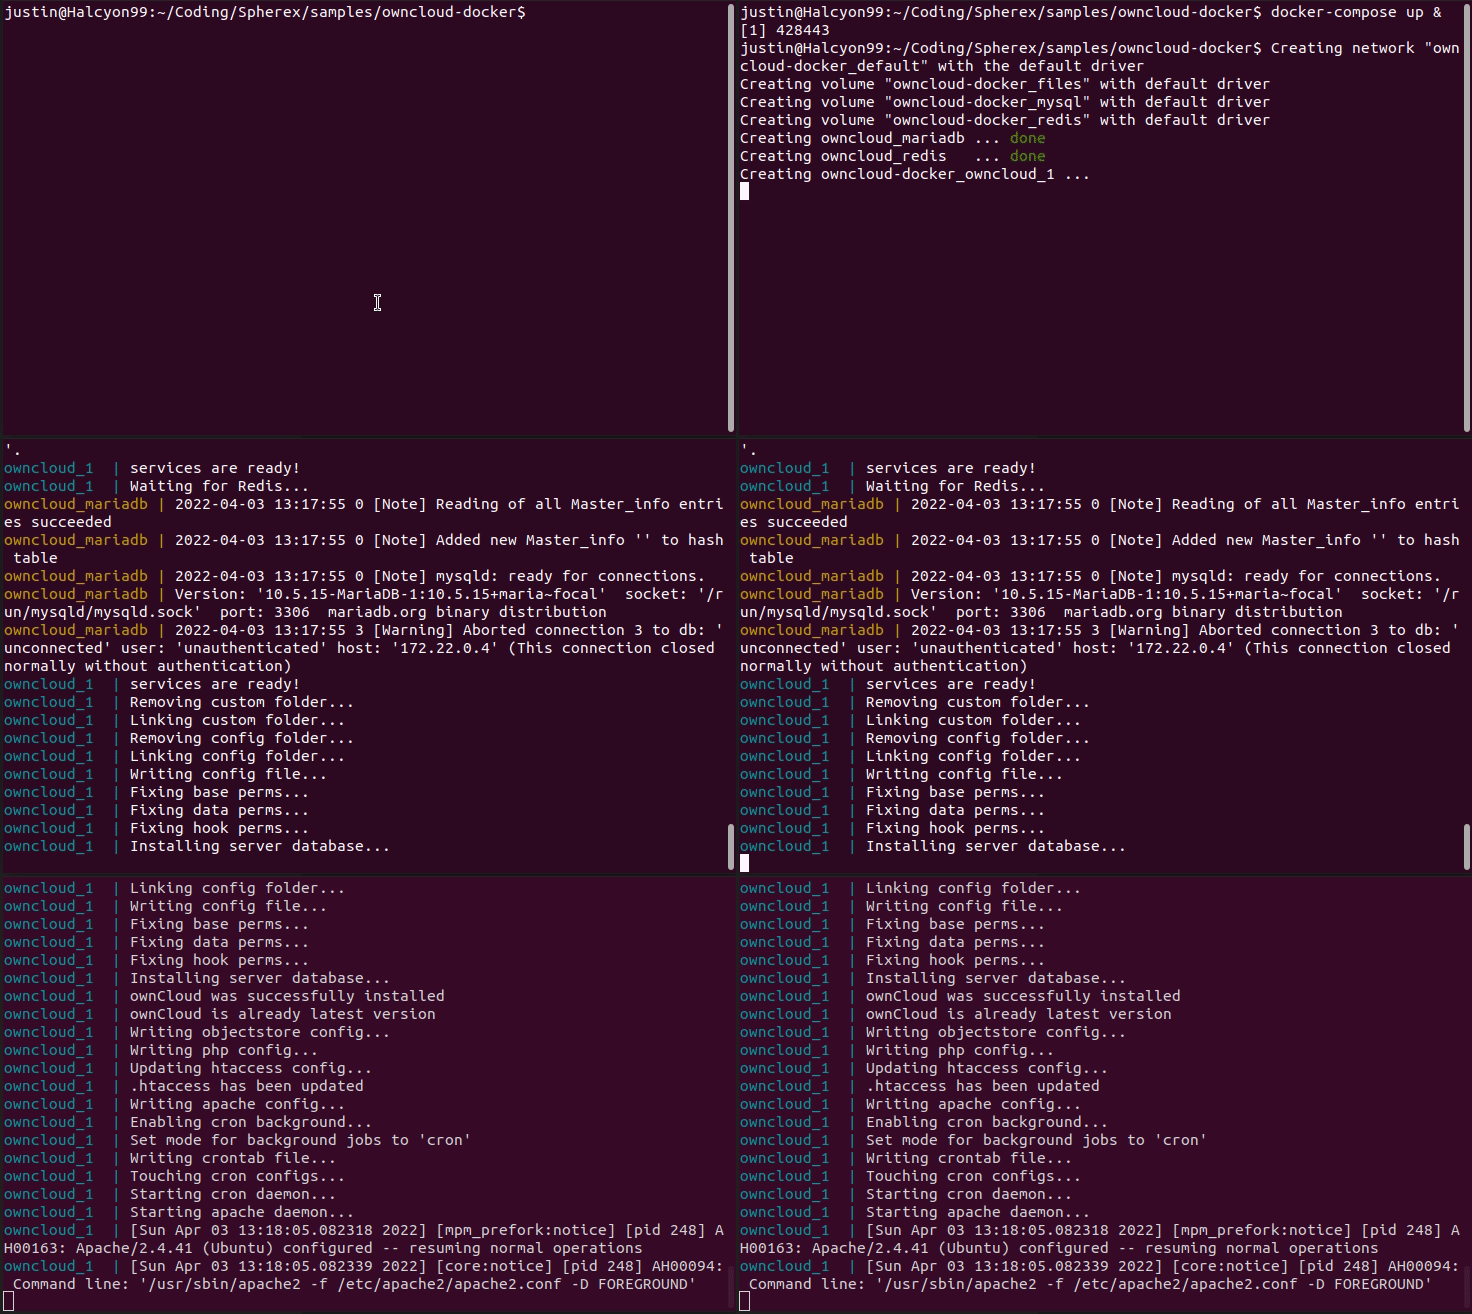
You might see a download process to download the docker images before starting, but in total it should take about ~ 90 seconds to download and get started (depending on your internet connection).
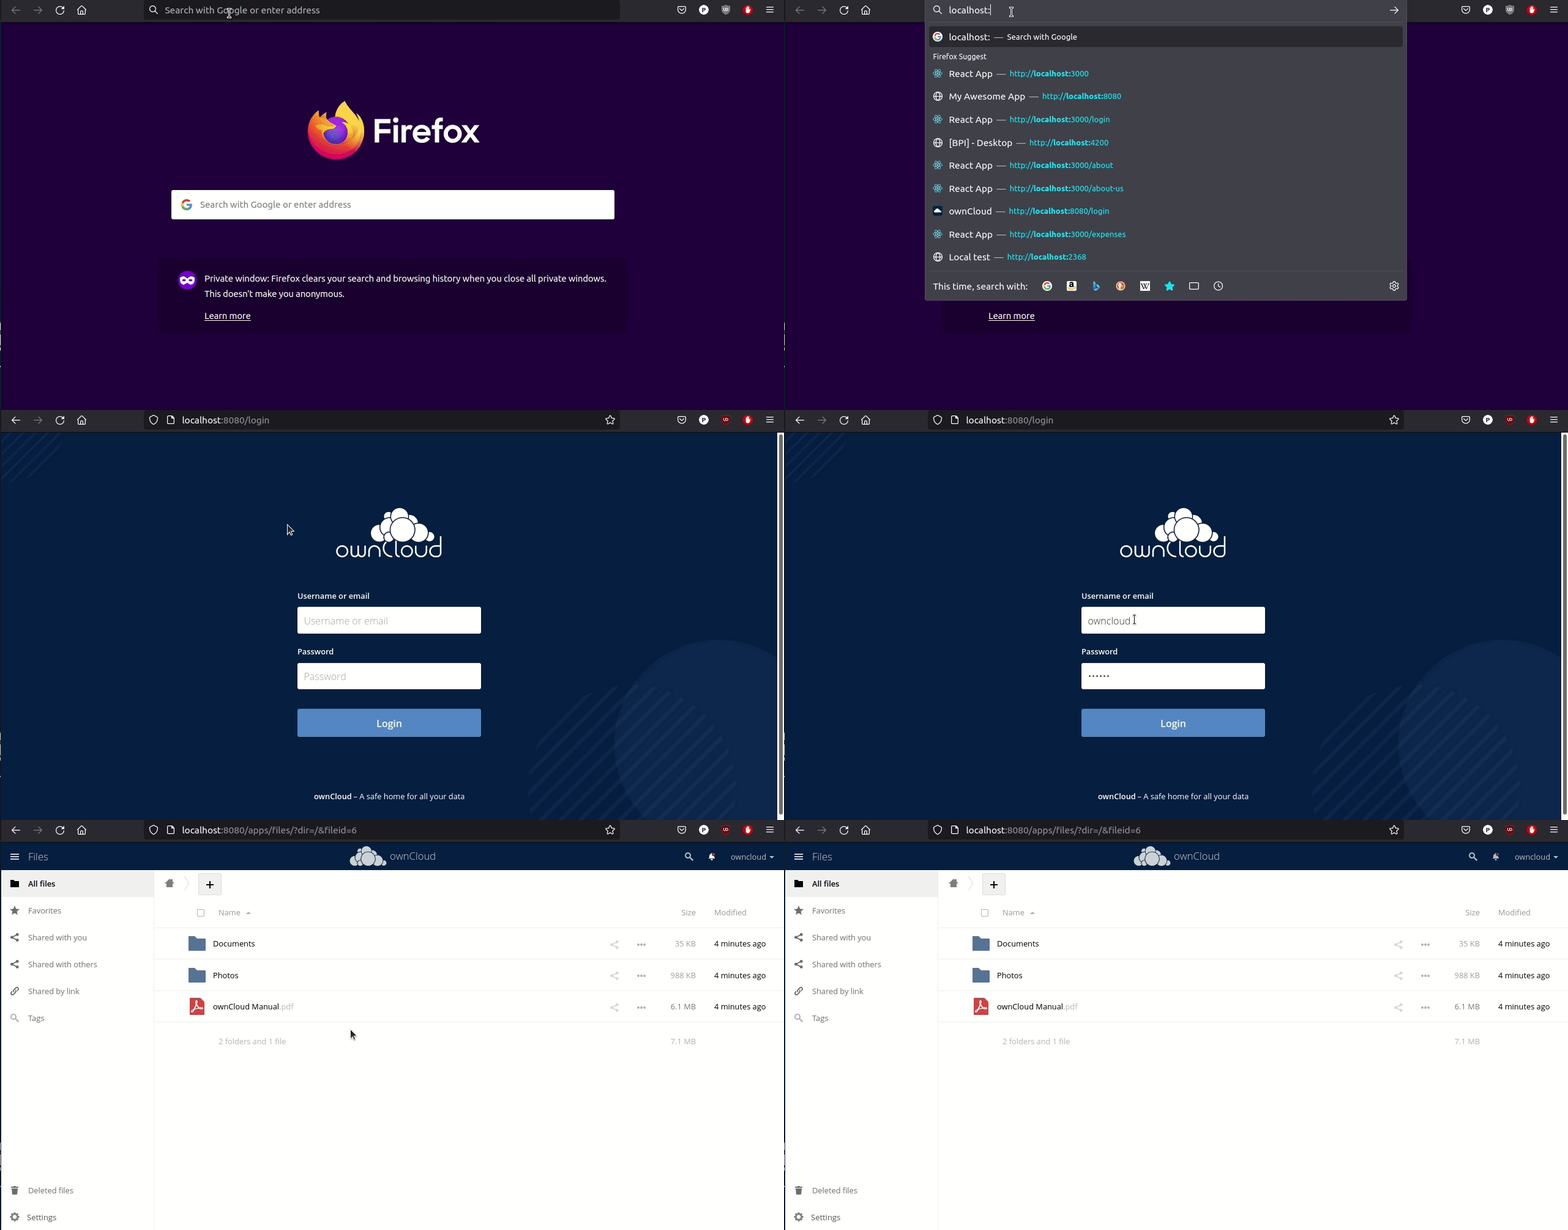
Once the lines in the terminal have settled down, you'll be able to open your favorite browser on your machine to login into your running owncloud instance via http://localhost:8080. The default login and password in this case is owncloud/owncloud, so ensure that you change these credentials when exposing your instasllation to the internet.
Once you are logged in, you'll be able to see a webpage with some initial files and from there will be to upload and download files.
To make the experience more similar to what you might have with dropbox installed on your machine. Owncloud also has its own desktop client. Once installed, you simply just need to click on the Add Account button and add the url with your login and password to allow the client to start syncing files.
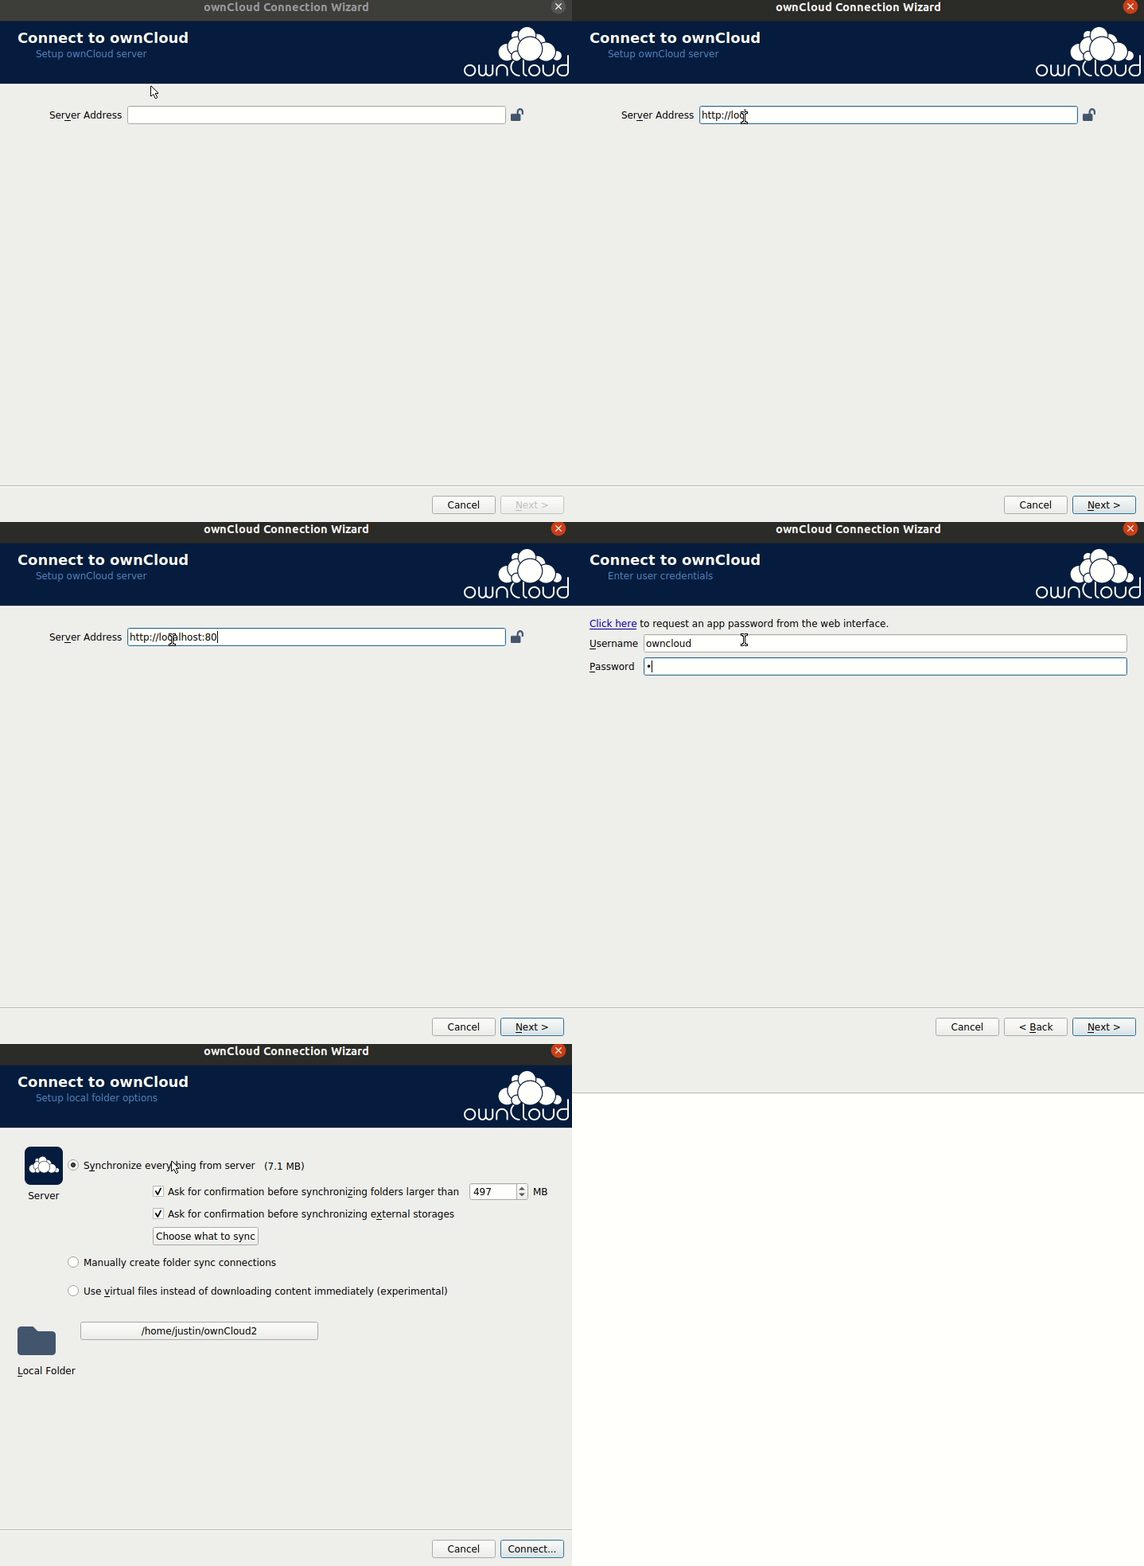
From here, the desktop client will be configured and you'll be able to drag and drop files into the owncloud folder and have it synced to your server.
Securing Your Installation
If you are satisfied with your installation of owncloud, the next step to exposing this to the internet will depend if you'll be installing this on a machine at home or on a cloud machine that you control. There are settings in the docker-compose file that are not secure, in the interest of making it easy to start your own owncloud server. I highly recommend changing the default credentials.
The next steps would involve buying a domain name and configuring it to point to your public facing machine and using a reverse proxy such as nginx to proxy requests from a particular url to the owncloud service (which are great next steps to take and learn when delopying a public facing webpage!) Those next steps, as they are dependent on every person's setup are left for the user to explore, but if you do have questions, feel free to contact me via the contact page.
In the mean time, enjoy trying out your self-hosted cloud storage service!
